The Level Design of Project Mana
Level Goal and Theme
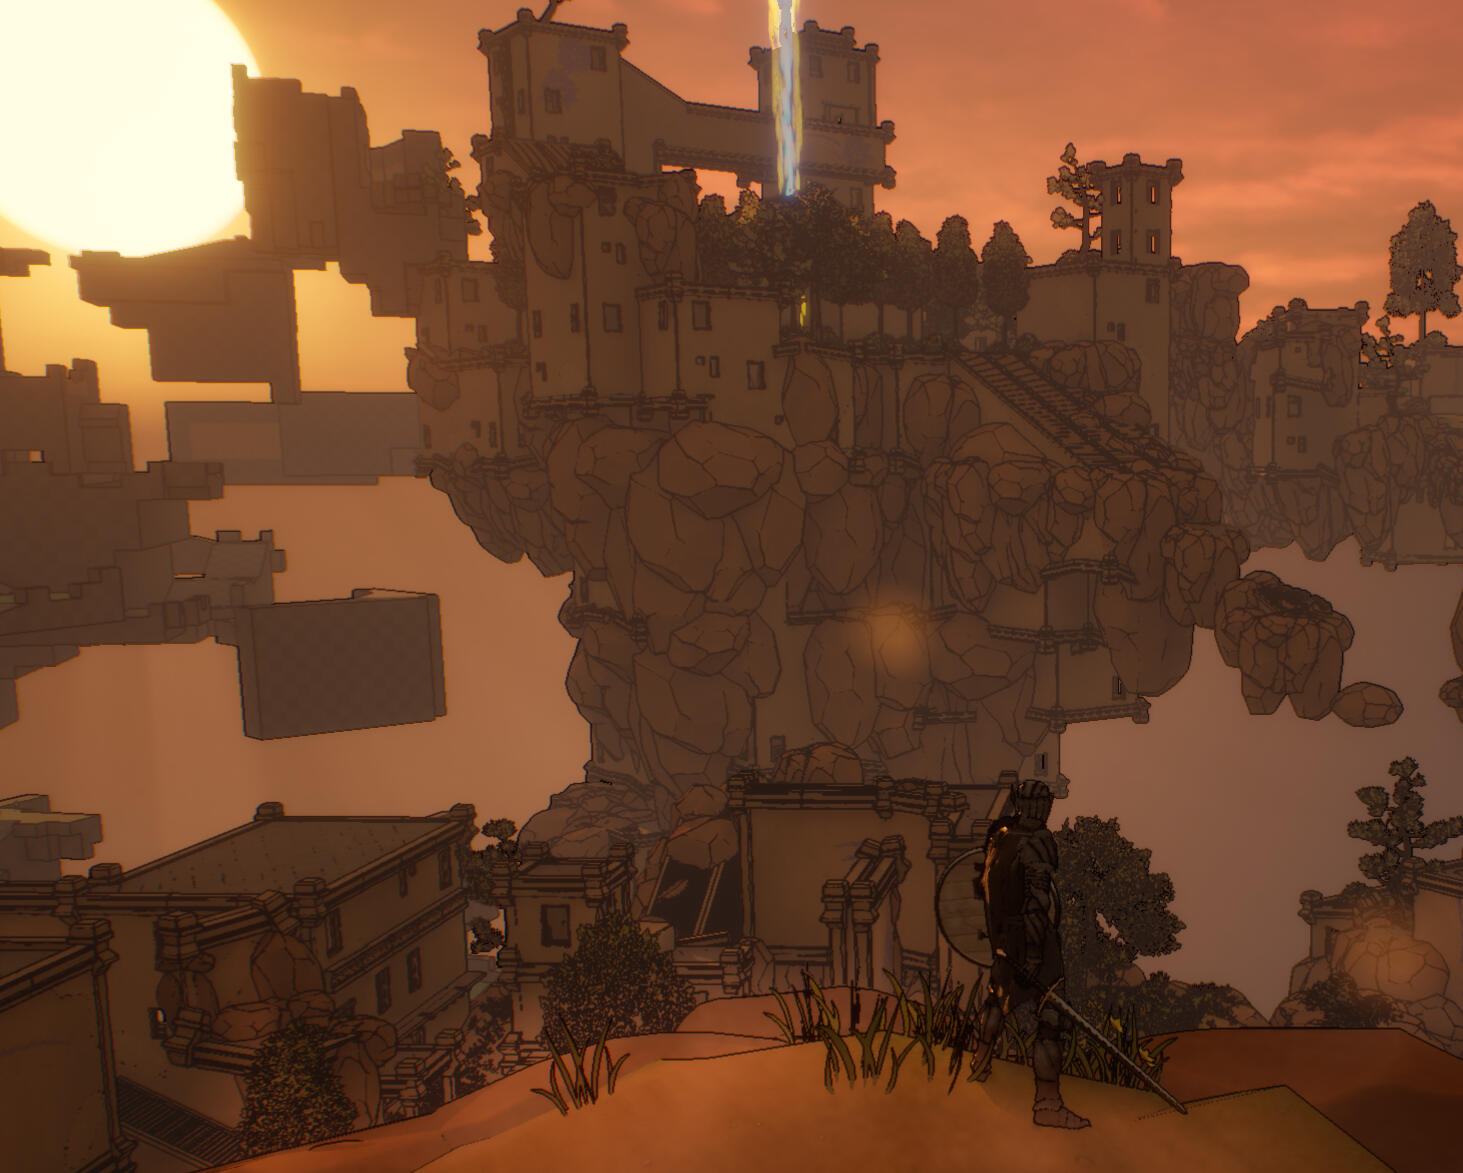
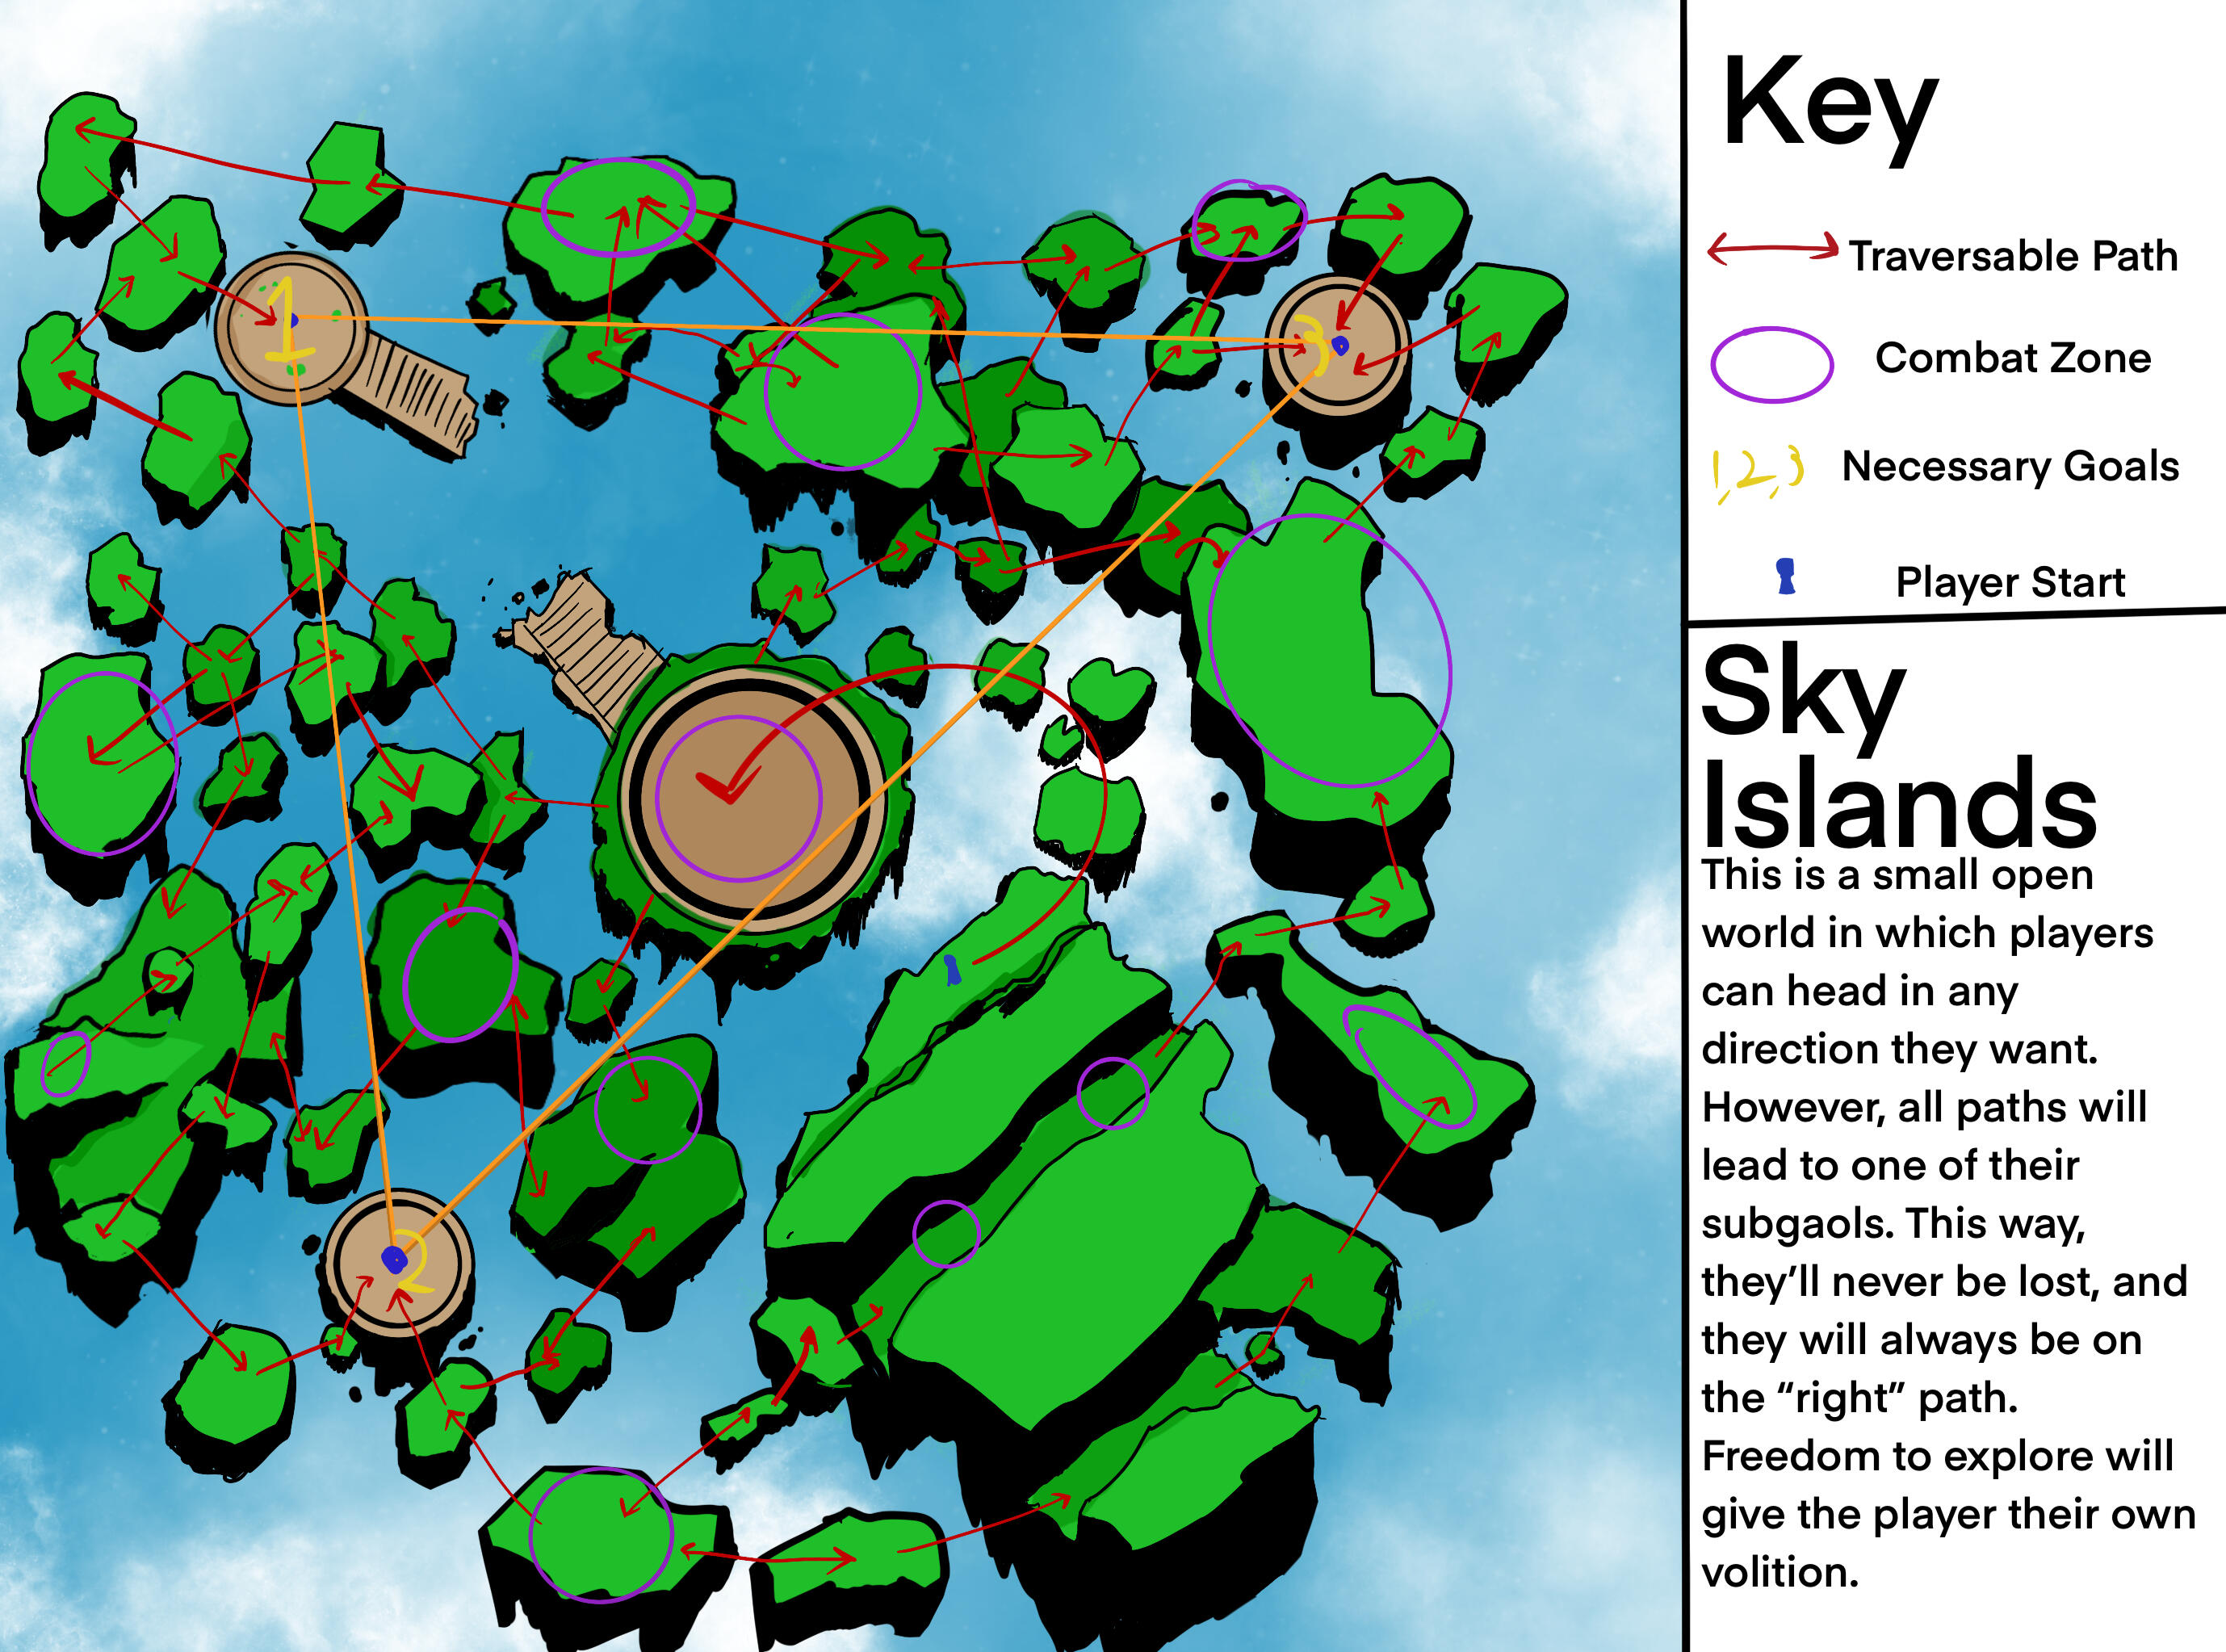
This is an open-world level with three distinct points of interest (POIs) that can be navigated in any order. This level takes place on floating islands that can be navigated by utilizing a hook shot and wall running. The level takes place on a series of sky islands that were thrown into the air after a man-made geographic disaster. The environment is a combination of naturalist landscape and the architectural remains of a long-dead civilization. The level is designed to teach players the main mechanics in a largely harmless environment and evoke a sense of freedom in the player.
Intended Player Experience
To create this level, I had two key goals I kept in mind for the core player experience. I wanted the level to give the player a sense of wonder and volition through a large, exploration-heavy map, and I wanted to teach them everything they have to know about the core mechanics of the game.
Instilling Wonder & Volition
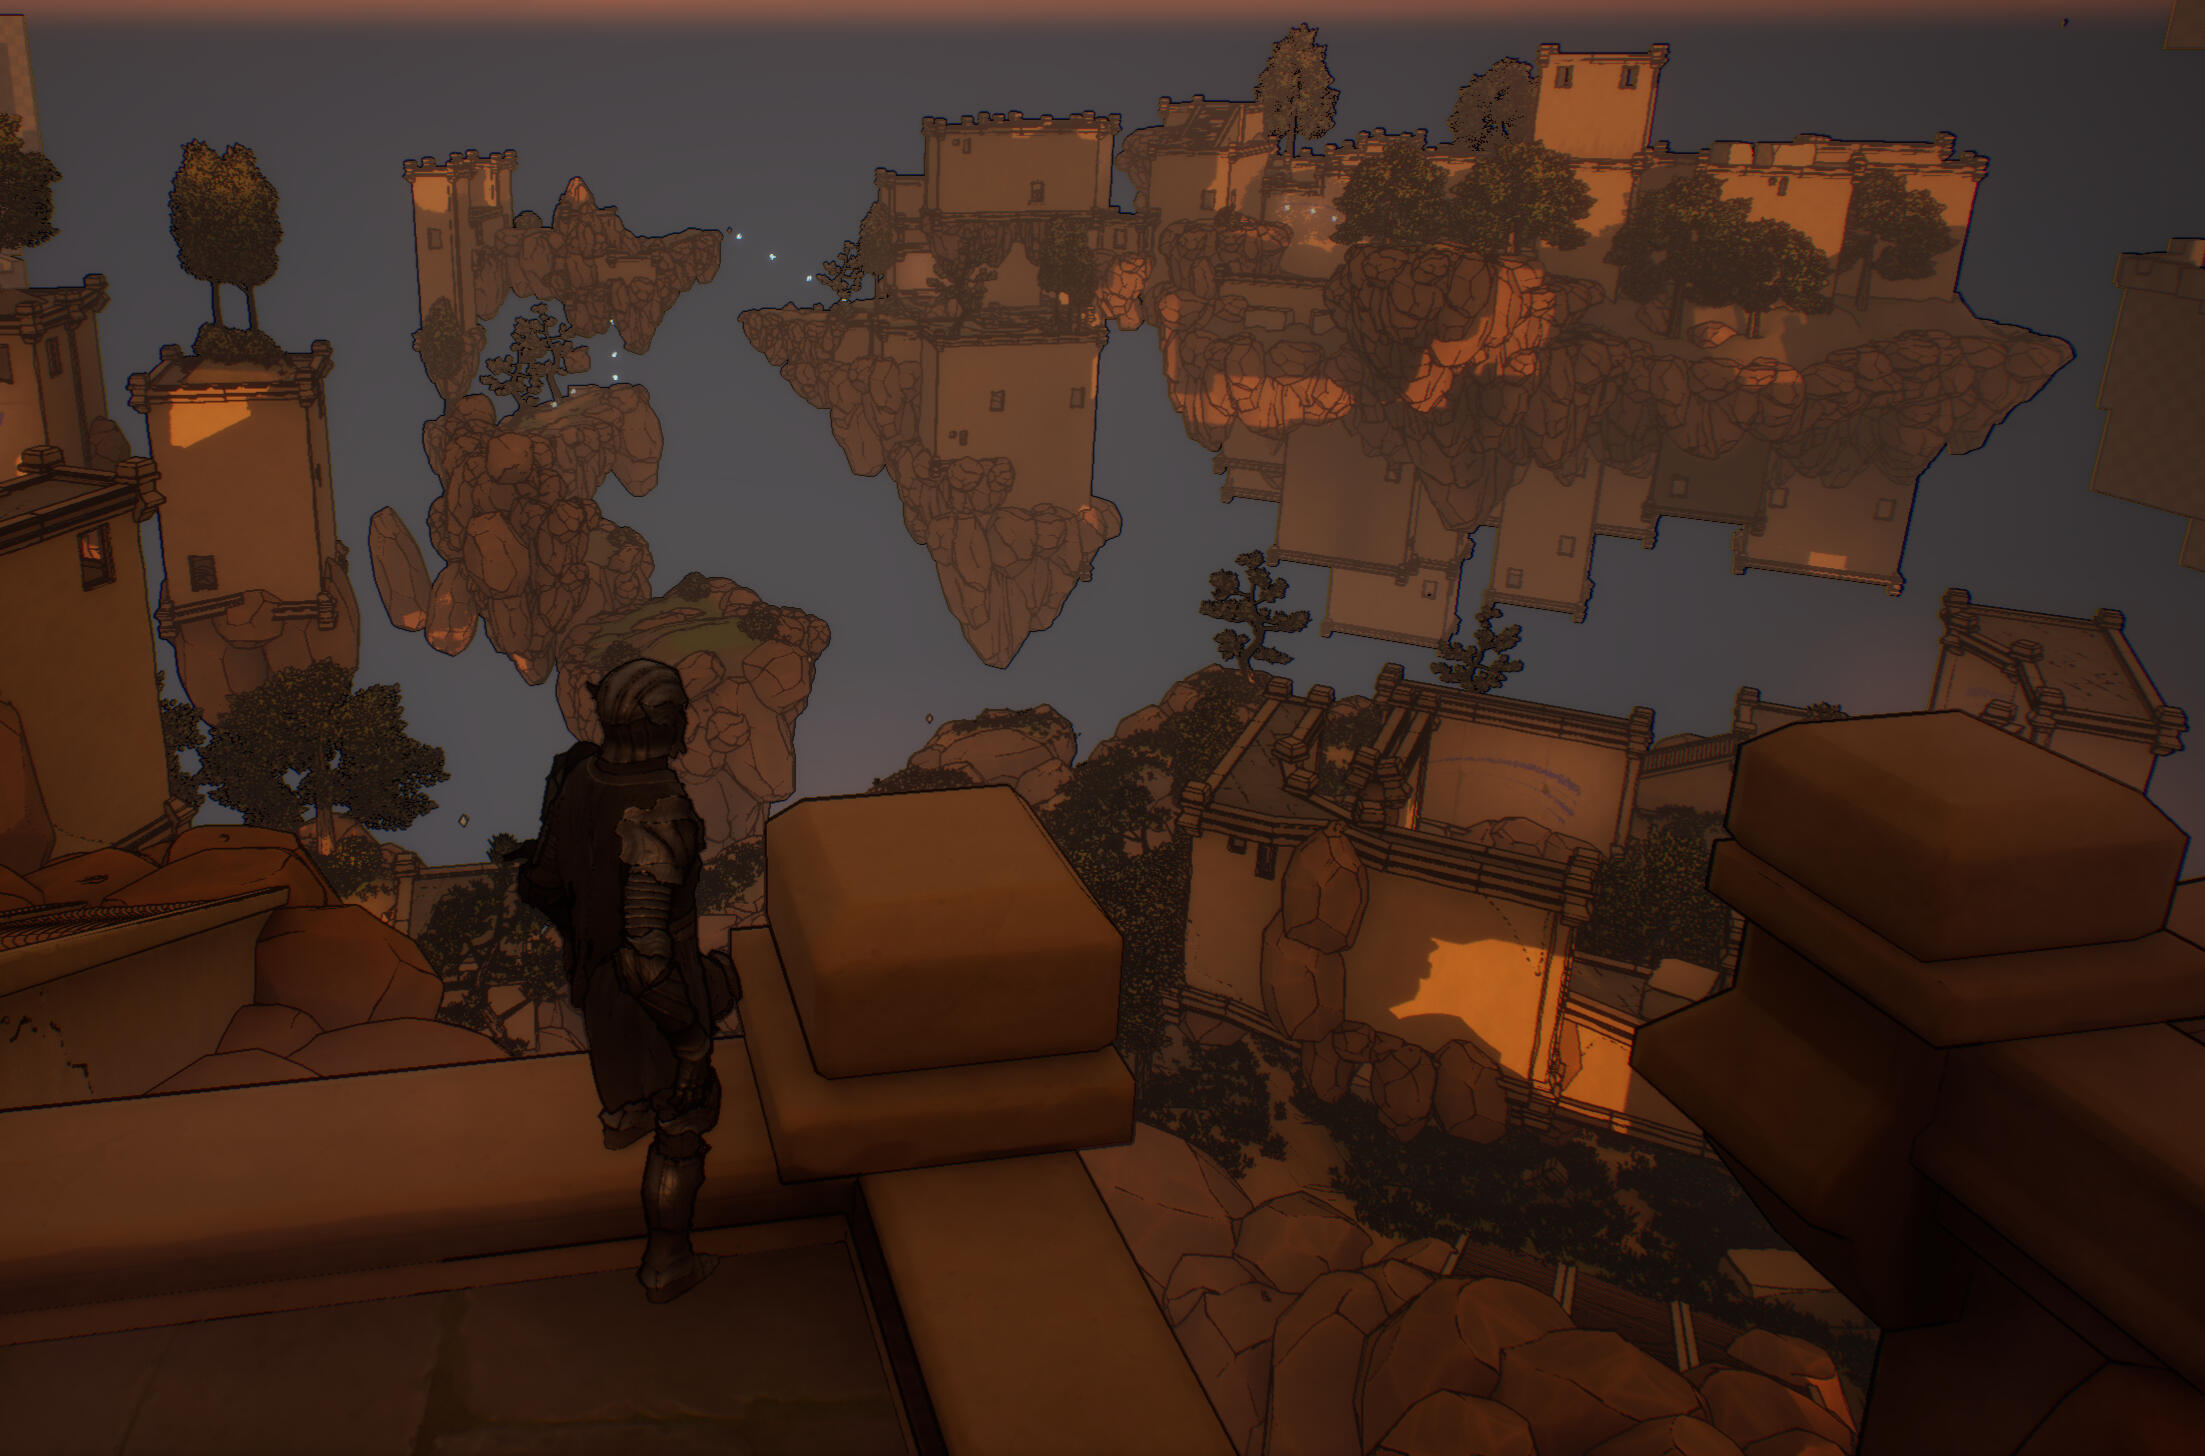
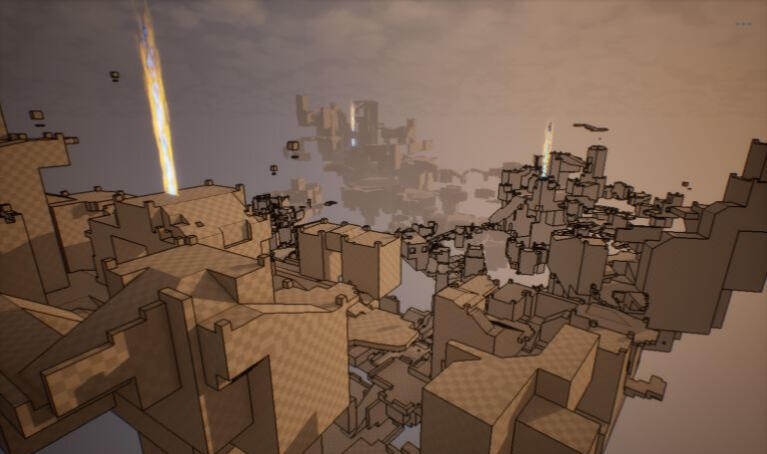
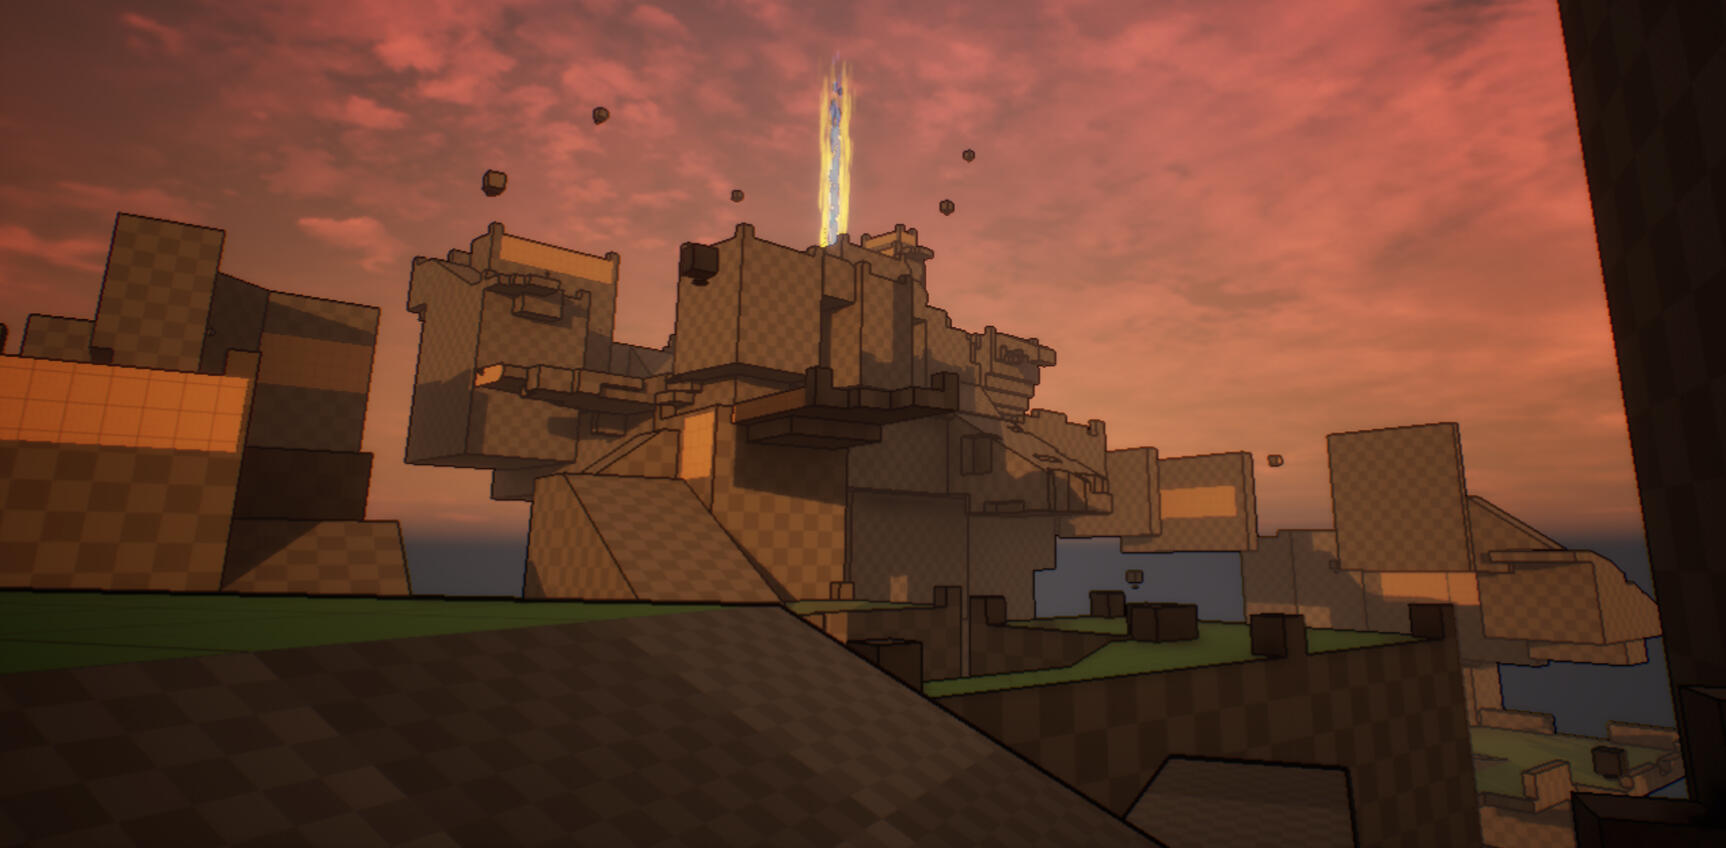
Since I wanted to give a sense of wonder, that meant that the level had to be large enough to capture that sense of scale and grant the player a lot of room to explore. However, due to the size, I had to make sure the player never felt astray or lost. To prevent this, I implemented three POIs in the level, and several possible paths between them. This way, each POI acted like a hub with many different routes leading to them. Sort of like how all roads lead to a major city on a map. This way, no matter which direction players went, they’d be heading to a critical POI.I also added a tall sky beam to each POI. This made every POI very easy to see from anywhere, so players could reorient themselves based on them. This way, players would always have an idea of where they are no matter their location. With both of these systems in place, players could explore wherever they liked without feeling lost. This balanced the level to allow for exploration while still leading them along the crucial path.
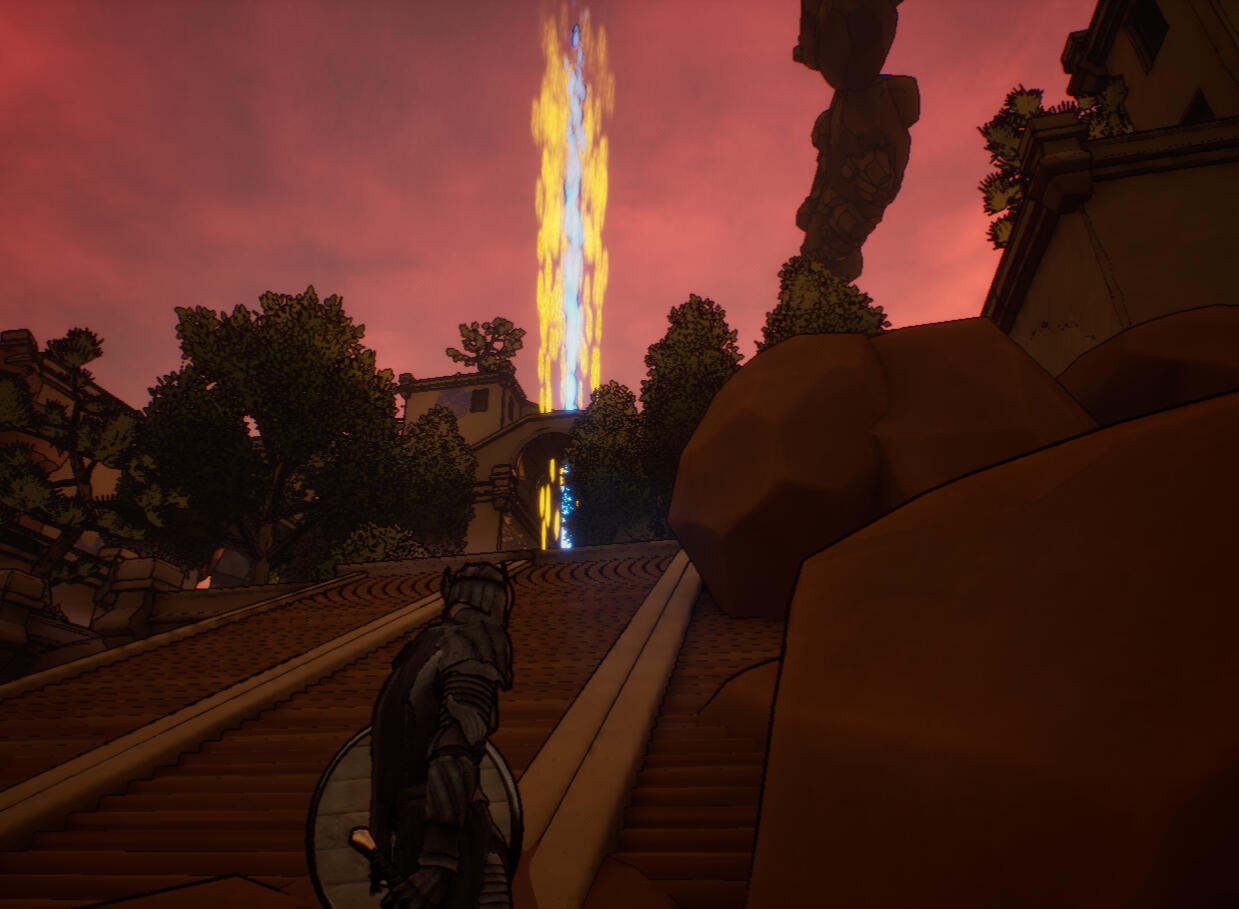
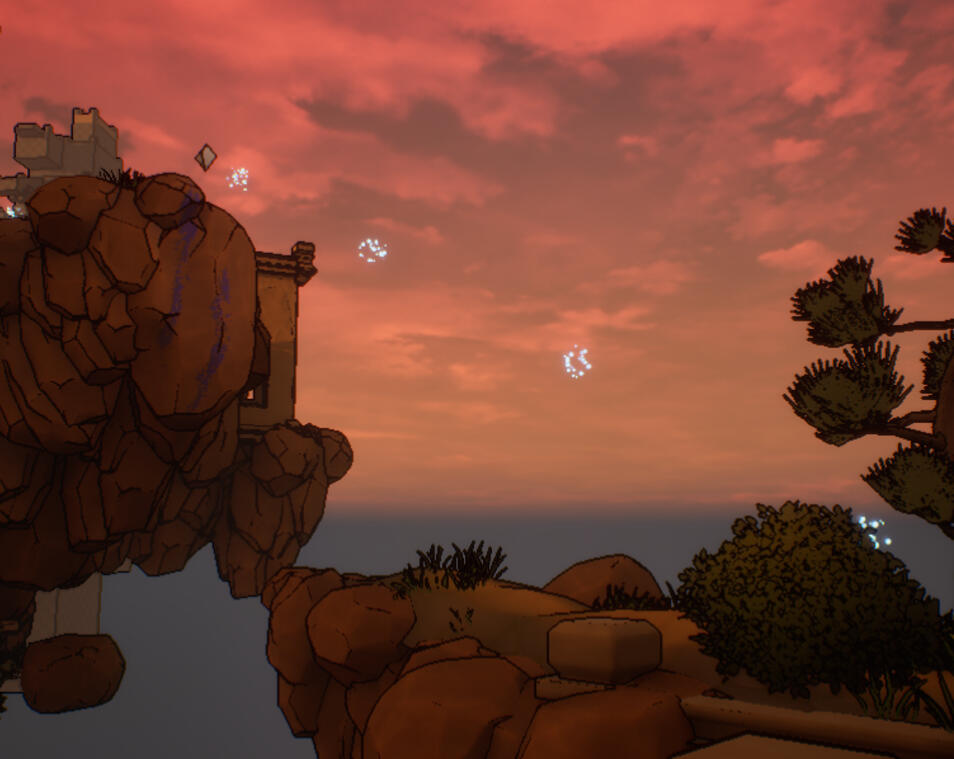
Skybeams made for easy to see goals.
Teaching the Core Mechanics
My other goal was to teach the player everything they needed to know about the game without explicitly spelling it out. Text pop-up tutorials would undercut any feeling of free will, and that would undermine the core experience the level serves. To prevent this, I baked tutorialization directly into the level design itself. To start, I made the introduction of the level linear. I start by showing the scale of the level, but the player should notice that their first goal is the hub directly below them. To get to the hub, they have to follow a linear path that teaches all of the base mechanics in an easy to grasp, safe area.This linear area introduced all of the basic traversal mechanics of the game. From wall running to zip-to-point hooks. I expected the player to fail these moves on their first attempts so I made sure there was always ground to break their fall. On their way back to where they fell, they'd have to try the mechanic again to find their place.After the player completed the linear portion, they would reach the hub. The hub spokes out in three different possible directions. However, no matter which direction they go in, they get taught the same base mechanics, each with a different twist. For instance, if they head in one direction, they’ll learn advanced wall-running and zip-to-point latches. If they head in another, they’ll learn about swing latches. This way, every player will know the same gameplay verbs, but they have the choice to learn each at their own pace. This means that they can learn what they want to, when they want to. This teaches the mechanics of the game through the level design itself and it grants them the power to explore at their own pace.
At the beginning, if the player fails to make the first wall jump, they get the immediate chance to retry.
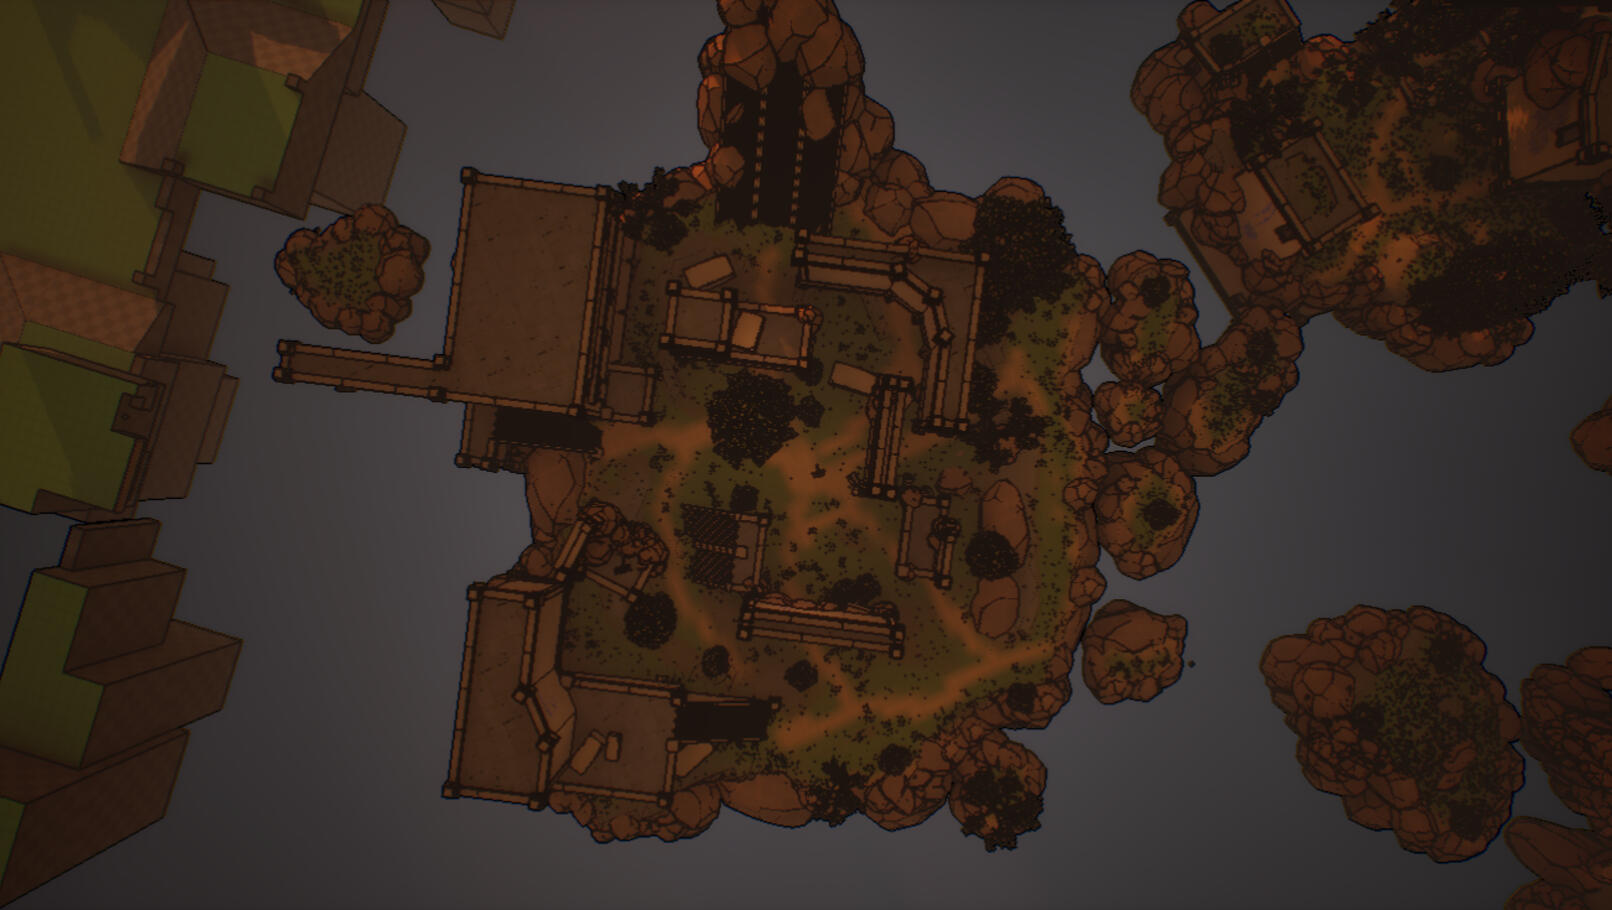
Top view of the Hub and the different directions it leads to.
Key Design Challenges and Solutions
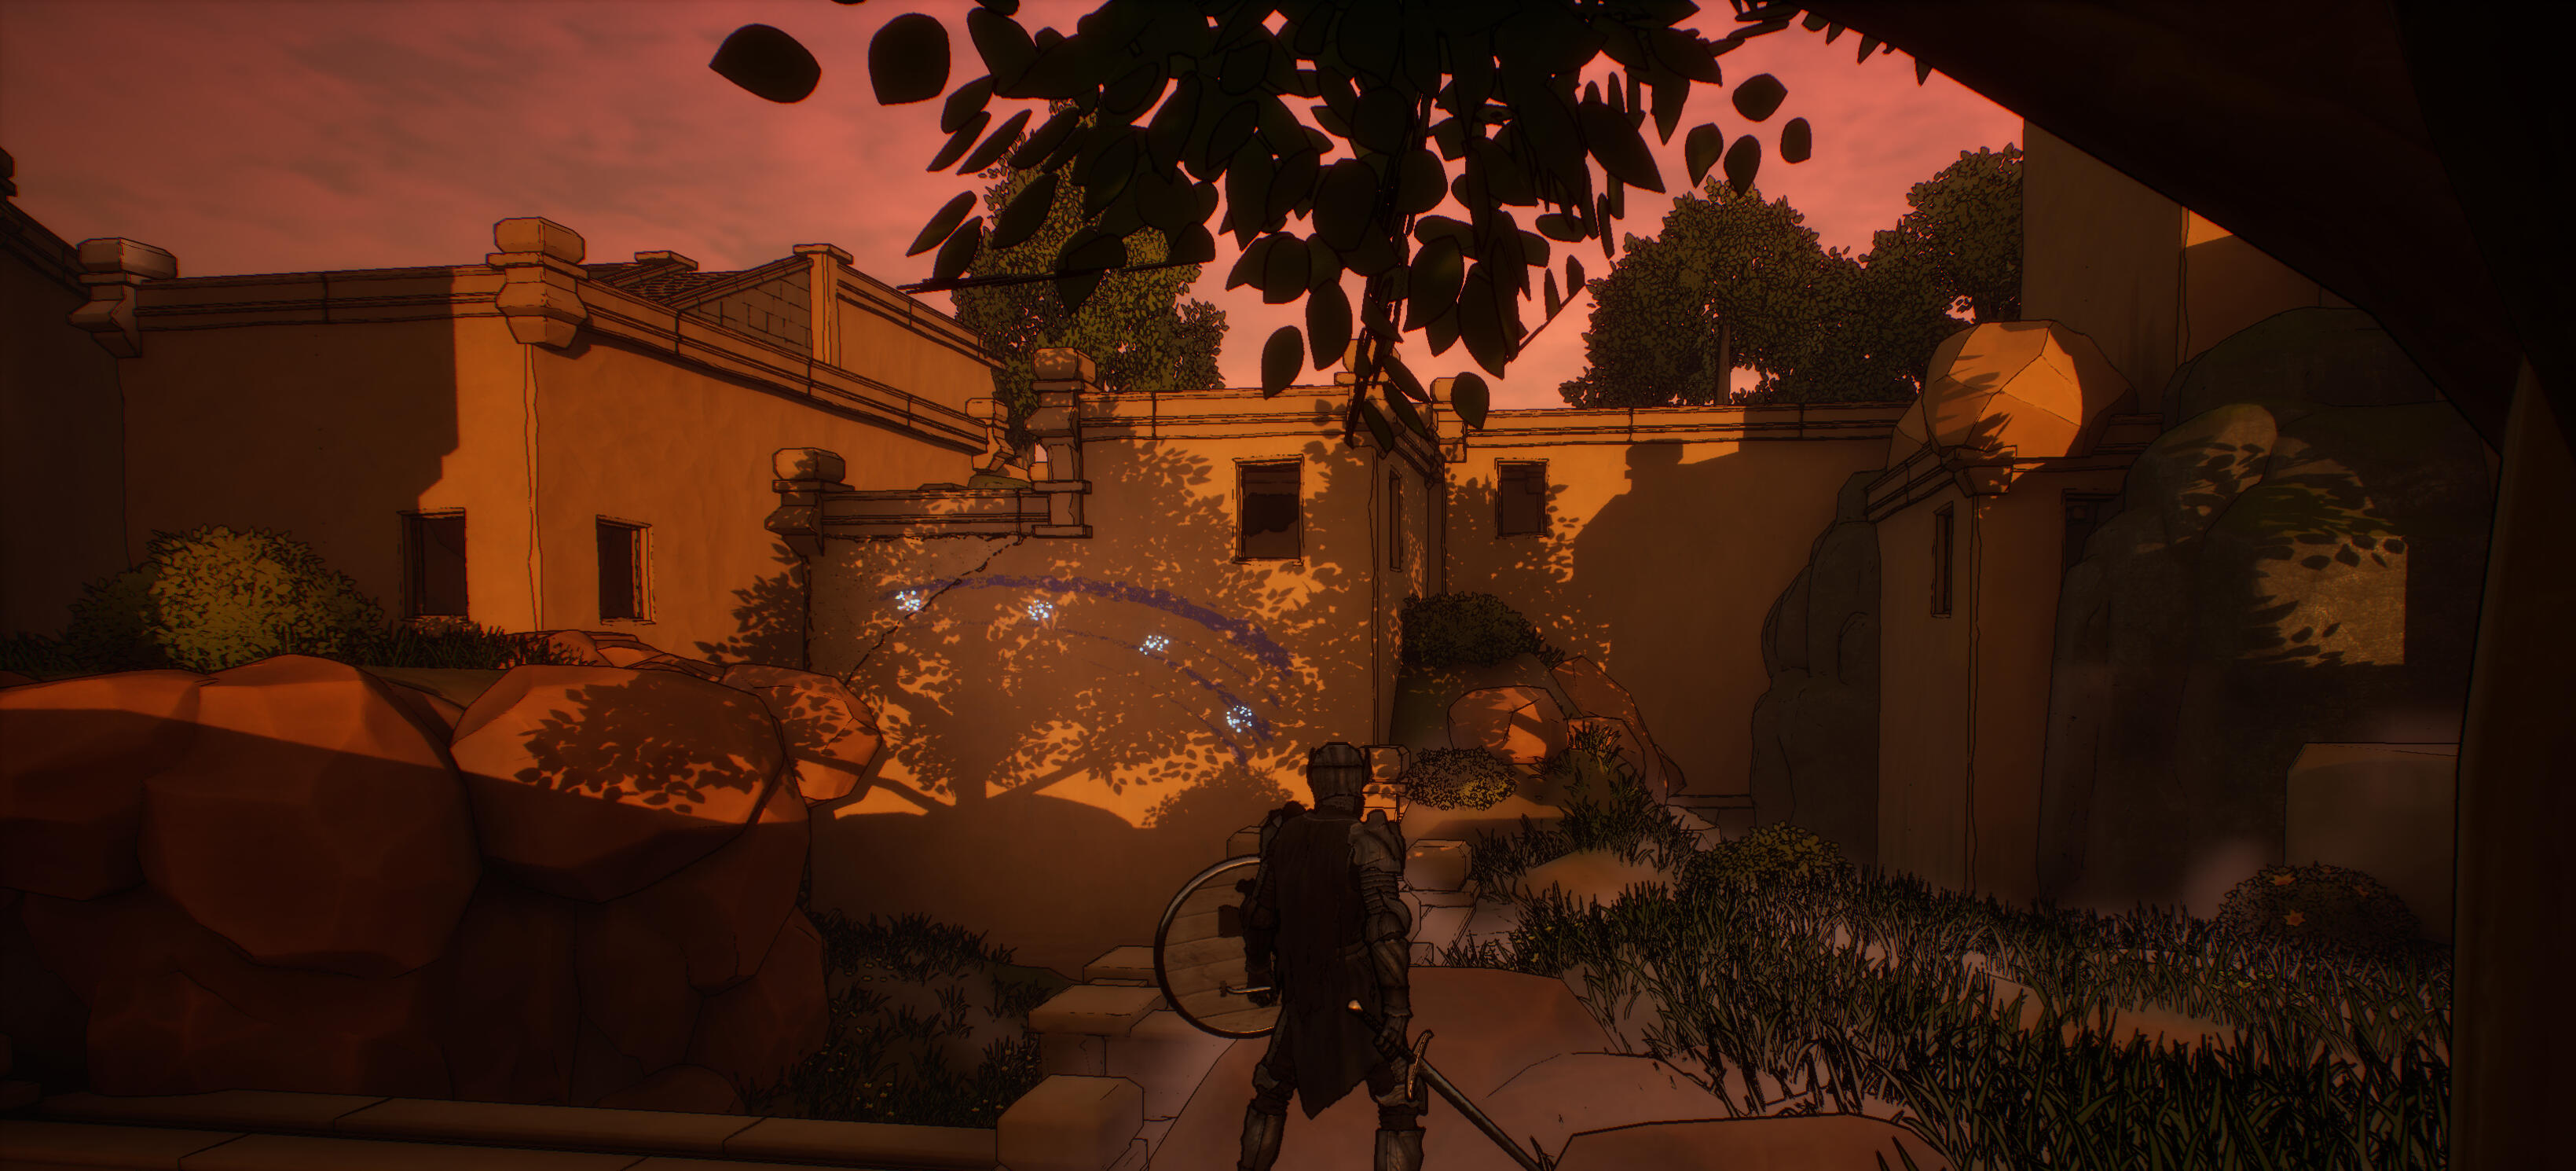
Playtesting played a key role in the level design development of Project Mana. Playtesting allowed me to have fresh eyes on the player perspective and provided direction for the level to go in. This kept my process iterative and ensured that the level would be fun for players. Occasionally, it would be validating. I’d hear my playtesters go, "woah," or reorient themselves by taking in the environment and looking for the POIs. Most of the time, however, it would point out key flaws in the level that I’d have to fix.One key issue I kept running into was a sense of confusion the players felt in certain areas. This is because, most times, they wouldn’t look up! They’d miss key parts of the environment they needed to explore to progress, and in order for players to be able to progress smoothly, these issues had to be fixed. I had three key solutions to this.The first is that I would show players where they had to go from a long way off. That way, they would have a different, more whole perspective that more clearly showed the layout beforehand. I ensured that there were plenty of vistas and other breather points to take in the environment. This way, the player could see any future targets that could be above them.To ensure their goal was clear, I added striking colors to the hook and environment. This was my second tactic to keep players looking in the right direction. Hooks are a pure white color, and they are usually contrasted by a blue decal behind them to catch the eye. They are placed against the very warm environment, so they really pop out. Players see them immediately, and they naturally progress there. These signifiers clearly laid out areas that the player could interact with so they would know where to go.Lastly, I added a camera effect that rotates the camera towards the hook targets. This way, if the hook was just off-screen the player's camera would tilt to face the right direction. It’s a subtle effect and it’s immediately overwritten by any camera input from the player. I wanted to be cautious with this since it could undercut the controls and the sensation of self-discovery, so I made sure to only point the camera where they needed to look. I made sure this camera effect wouldn’t solve any navigational puzzles for them. Instead, it would show the player what and never how. This solved that key navigation issue, and players had a much easier time exploring the level at their own pace.
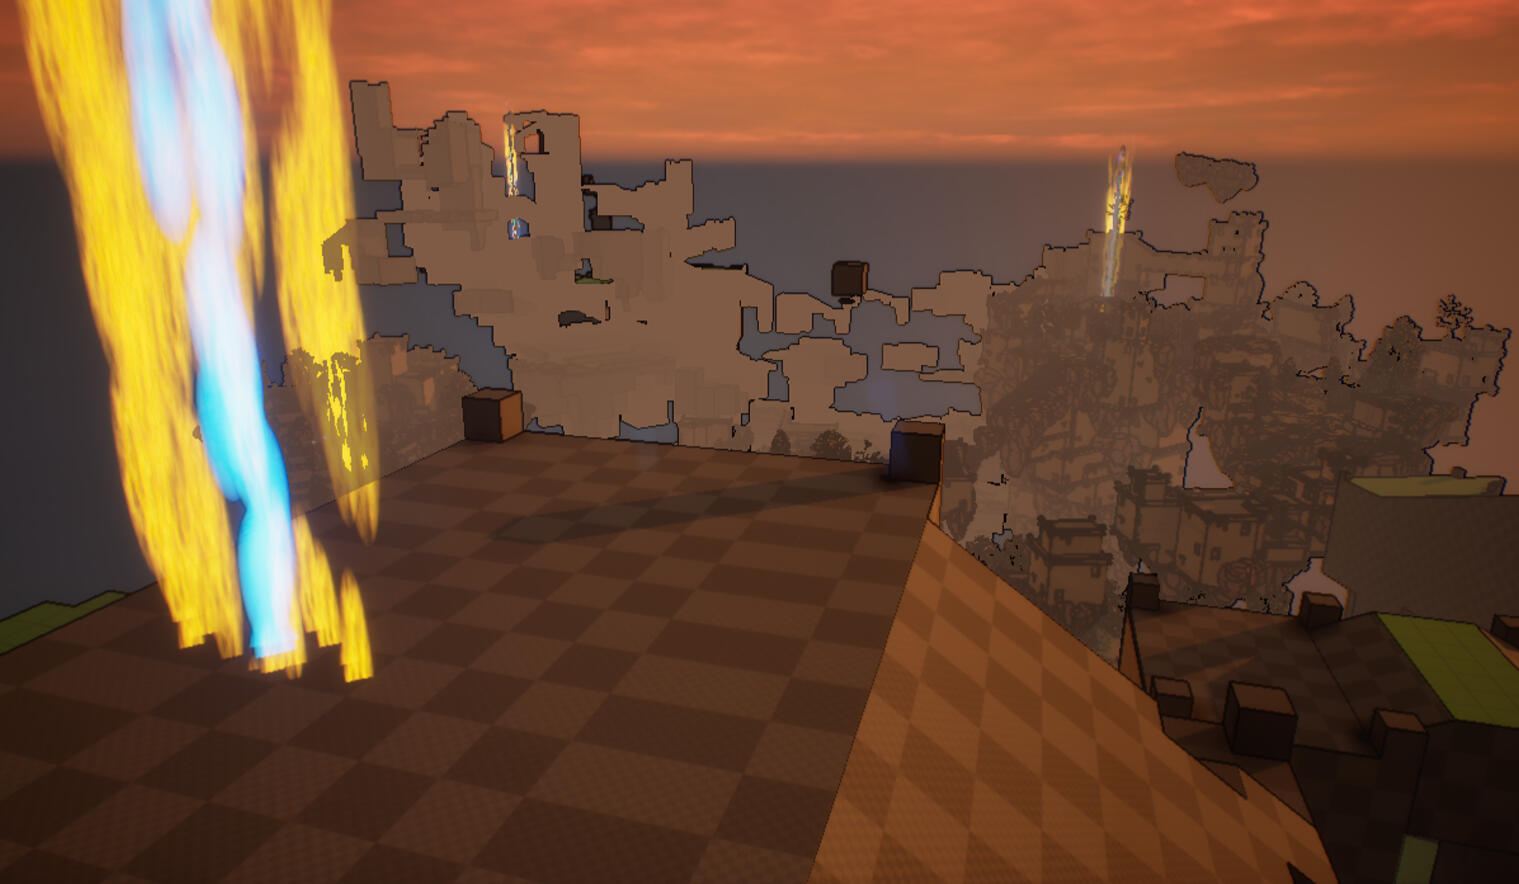
Blue Signifiers leading to a white hook
POIs (skybeams) playertesters would orient themselves from
Level Design Process
Concept Phase
The concept phase was like carefully drawing a bow before taking a shot. I wanted to make sure I landed my shot successfully, so I took my time to make sure I headed in the right direction. I initially started with just a rough sticky note where some of my initial ideas still stick. After sketching out my rough ideas, I set my key goals for the level:To give the player the ability to explore the ability to explore any where they can see and to instill a sense of wonder in them. With these goals in mind, I dove into the research phase.For the research phase, I studied similar environments such as Breath of the Wild’s “Great Plateau,” and Tears of the Kingdom’s “The Great Sky Island.” As I was researching, I asked, “How do these levels strike a sense of wonder in me?” and “How do these levels make me feel like I have my own free will?” I tried to apply my answers to these questions as much as I could into the early parts of the development so that they'd be baked into the design itself.From my research, I decided the best thing for my level was to have three unique POIs. With three separate goals in mind, the player could navigate wherever they wanted to and still be headed in the right direction. That way, players have the power to go where they want when they want.As I was researching, I picked up as much visual reference as I could, and I made a visual reference board with detailed notes to keep things clean. I made sure that my references were specific so that I could continue with a clear visual goal in mind. My board provided a clear environmental direction. If my board was all over the place, then my environment would be all over the place, too.I emphasized my visual development of my level to push the sense of wonder I wanted to evoke in the player. I wanted visuals that had great vistas that left the player thinking about the society that was there before them. To make sure the ruins felt consistent, I based them off of the real life Ancestral Puebloans. This way, I'd have lots of visual reference, and I would have a rich ancient culture to base my ruins off of.
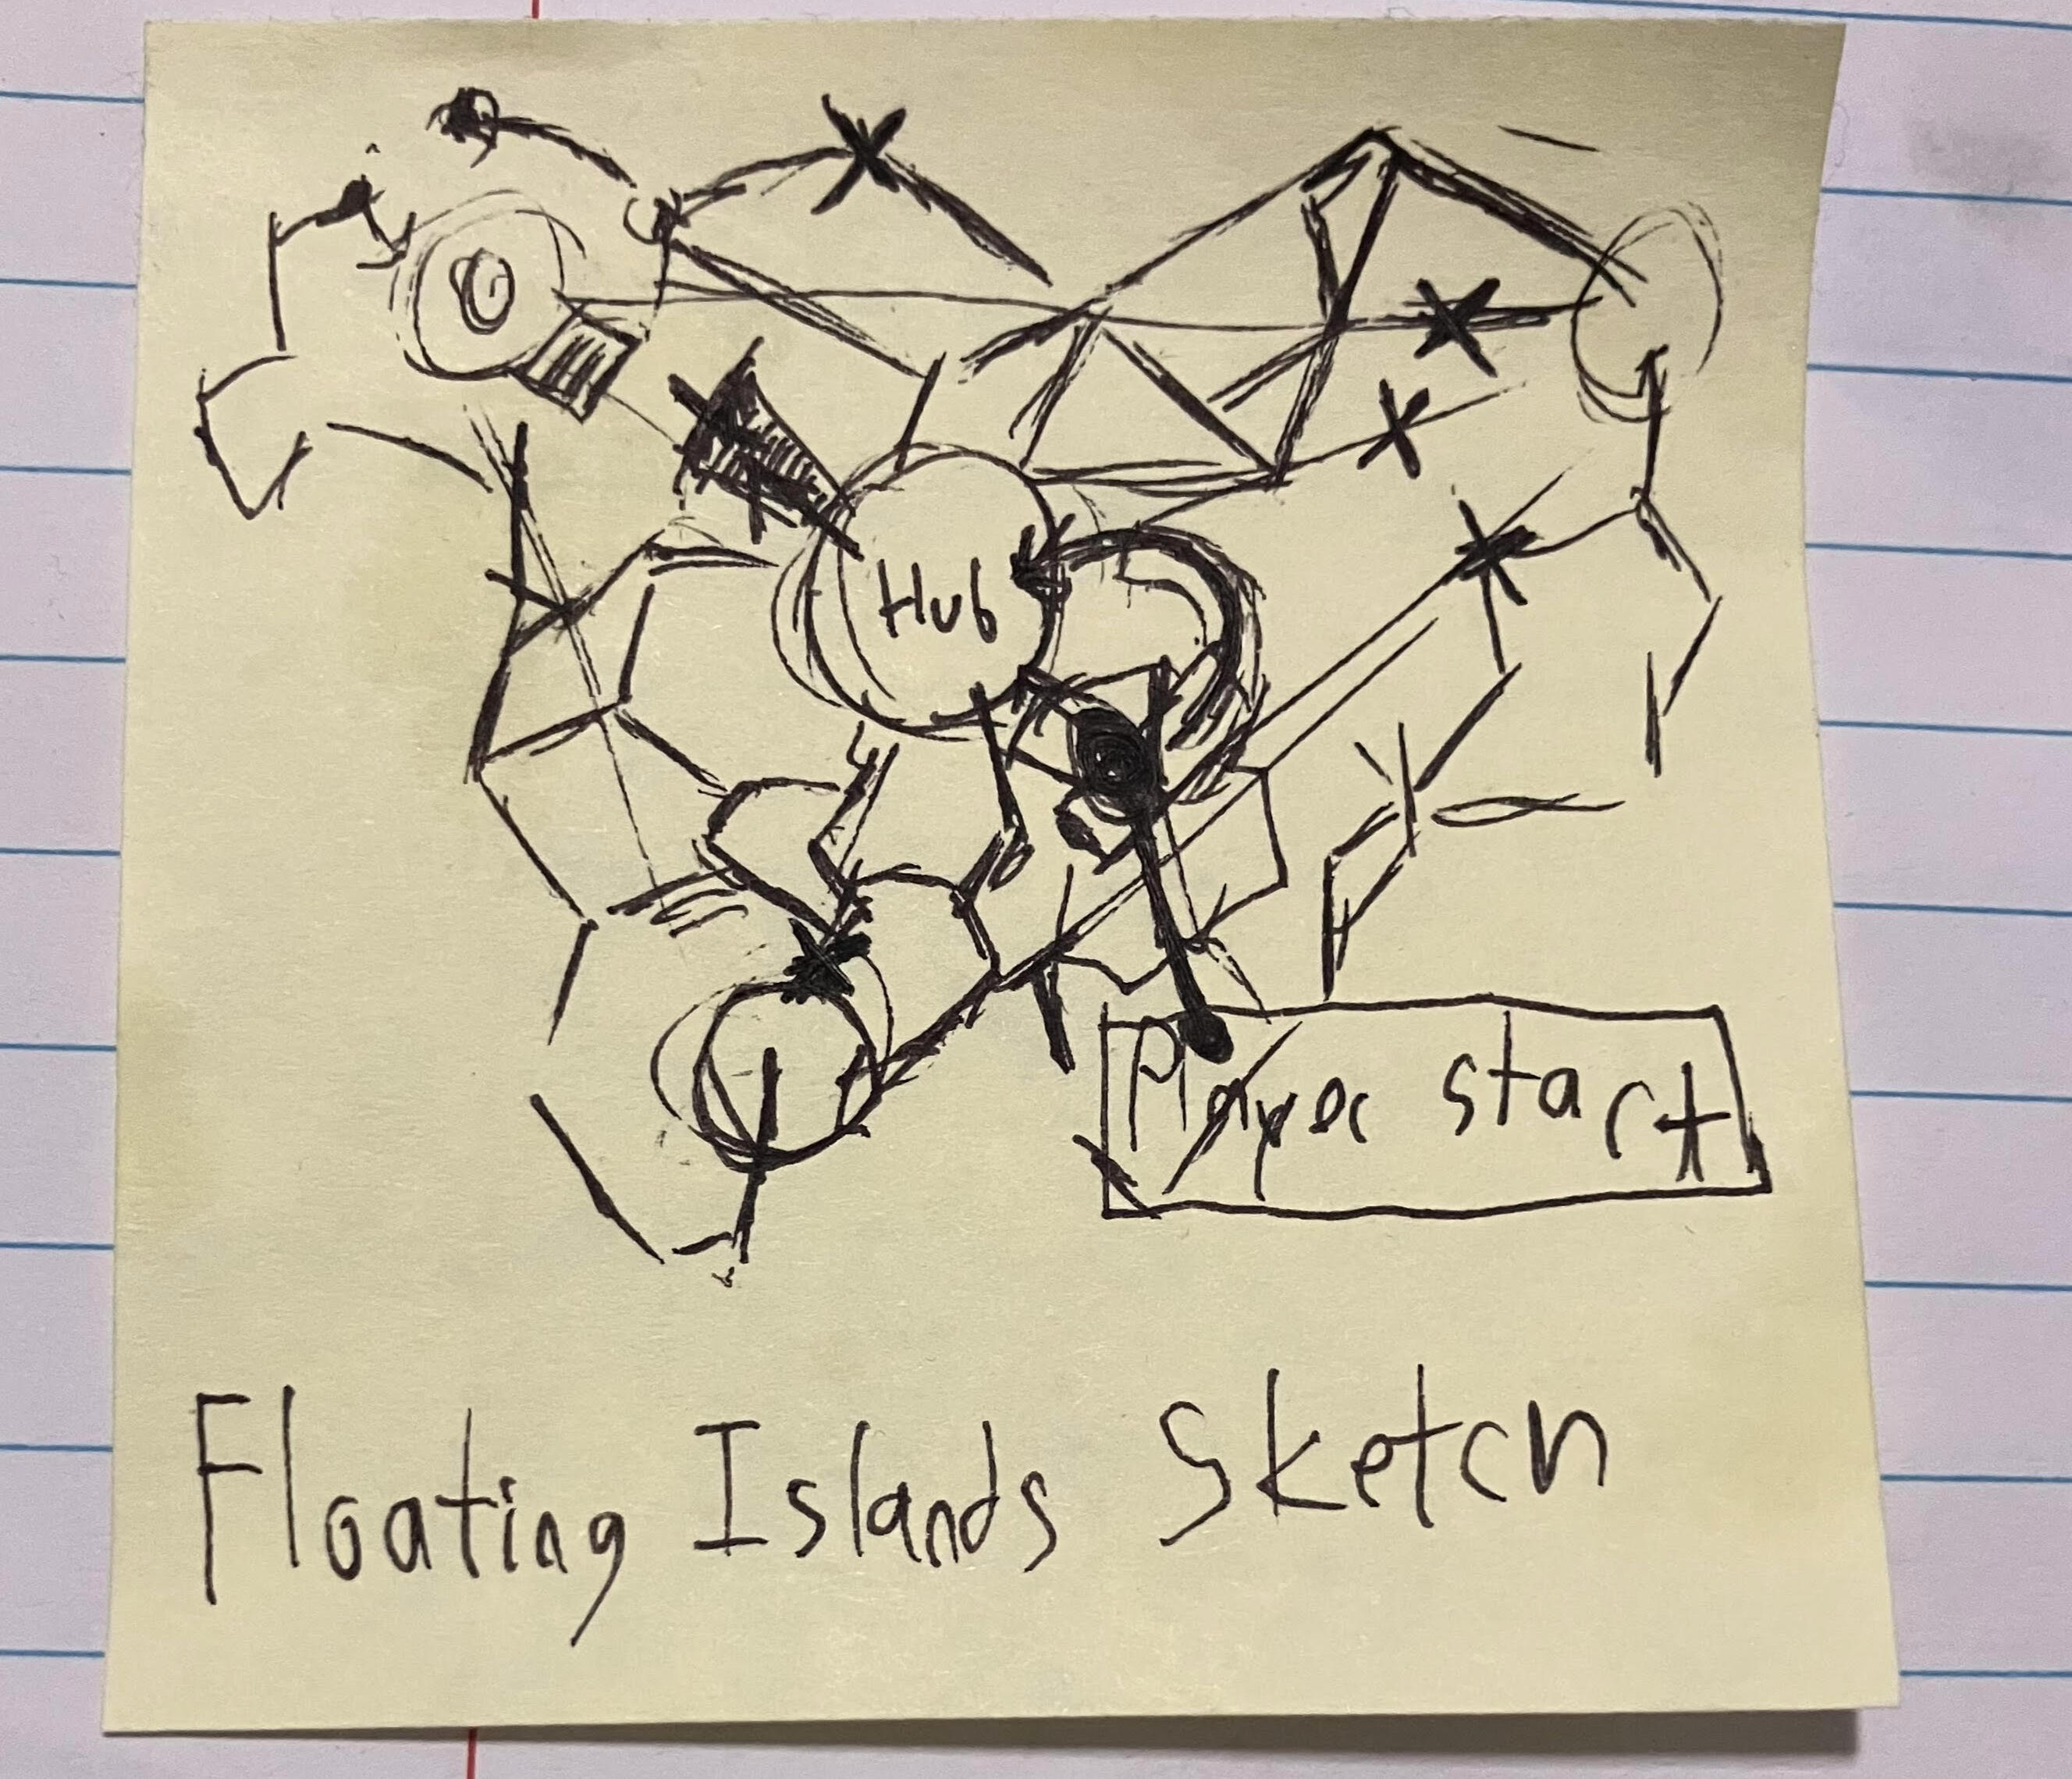
First Sticky Note Sketch
Cleaned up map of the level
Blockout Phase
The blockout phase was my key iteration phase. This was my space to test out my level ideas and see if it worked. I primarily used Unreal Engine’s Cube Grid tool to blockout my level. This tool was perfect because it allowed me to quickly generate terrain in the engine. This terrain was easily editable and I could adjust and test it on the fly. It was crucial for me to keep things like a sketch. If something wasn’t working, I could just throw it out. It’s key not to get too stuck on an idea early on. This way, the level stayed loose and adaptable as the blockout began to take form.I would frequently iterate my blockout. If my blockout wasn’t working, then I couldn’t go to the next environmental phase. I had to be sure that the level was finalized before I got there. How did I know if something was working? Playtesting. I would get friends, professors, and, frankly, anybody else I could get my hands on to play test my level to make sure things were good.For instance, one issue that popped up during the blockout phase was clarity. Play testers would know the traversal mechanics but they wouldn’t be sure where to go. This led to a major sense of confusion. So, I added signifiers throughout the level to boost clarity. This was crucial in solving a lot of navigation issues. Players would know where to go without the game expressly telling them about it. This one trick added context turned the level into something that was actually traversable for my play testers. I picked it up and applied it from my favorite GDC Talk: Level Design Workshop: Blockmesh and Lighting Tips
Early Blockout Iteration
Blockout with Signifiers added
Environment Phase
With my blockout finalized and my research and concept finished. I could move on to the environment phase. While I’m comfortable using tools like Maya and Substance Painter, I found the best course of action was to use asset packs. This would allow me to quickly create a fully realized environment, and it would grant me more time to focus on developing the level itself rather than making the individual assets. All assets used in the level are listed below.I placed assets that both fit the core themes set in my concept documents and the key gameplay experience set by my blockout. During the environment phase, I noticed that the level became a living, breathing world. I think this was largely thanks to the steady shot I was able to make by following the correct order of the process. I want to thank my level design professor Zachary Sewell for showing me the best way of going about it.Over the course of the environment phase, I learned about the importance of modularity. The asset packs I used by AleksandrIvanov were designed with modularity in mind that greatly improved my workflow. Each asset was made using matching measuring conventions, so I was quickly able to snap together large environment assets. To make sure that the environment assets fit the purposes of my game, I went through and edited the collision of the meshes as necessary to ensure that my character motion still worked smoothly.While developing my environment in Engine, I realized that a lot of the clarity of my signifiers were beginning to disappear! I had to go back in and find a crucial solution. It was primarily an issue with color. My signifiers were bright yellow, but that wasn’t working with the ruins asset pack I was using. So, I made the decision to switch to blue. This reverted back the much needed clarity for the open world level and it allowed players to navigate through the map clearly again.